

How To Take Landscape Photos With Iphone
Have you ever taken an iPhone photo of a stunning view, but for some reason the photo didn't work out as you expected? Most iPhone photographers have had that experience, because the views that look great in real life don't necessarily result in great landscape photos.
On the other hand, even an average landscape can be turned into a spectacular photograph if you know how to take full advantage of each photo opportunity. In this article you're going to discover 10 simple and powerful tips for taking stunning landscape photos with your iPhone.
1. Include details in the foreground
Including interesting details in the foreground is probably the easiest way to improve your iPhone landscape photos. However, this is counterintuitive to most people. After all, they want to take a photo of the stunning view in the background, so why worry about the foreground?

To give you an example, in real life the mountain in the background looks a lot more impressive than the simple tree in the foreground. However, taking a photo of the mountain alone would result in a flat landscape photo where all the subjects are located far in the background.

By combining subjects in the foreground and the background, we can show depth in our photos, which in turn makes them immersive and inviting. There's nothing worse than a flat landscape photo, and adding detail in the foreground is the easiest way to show depth in your photos!
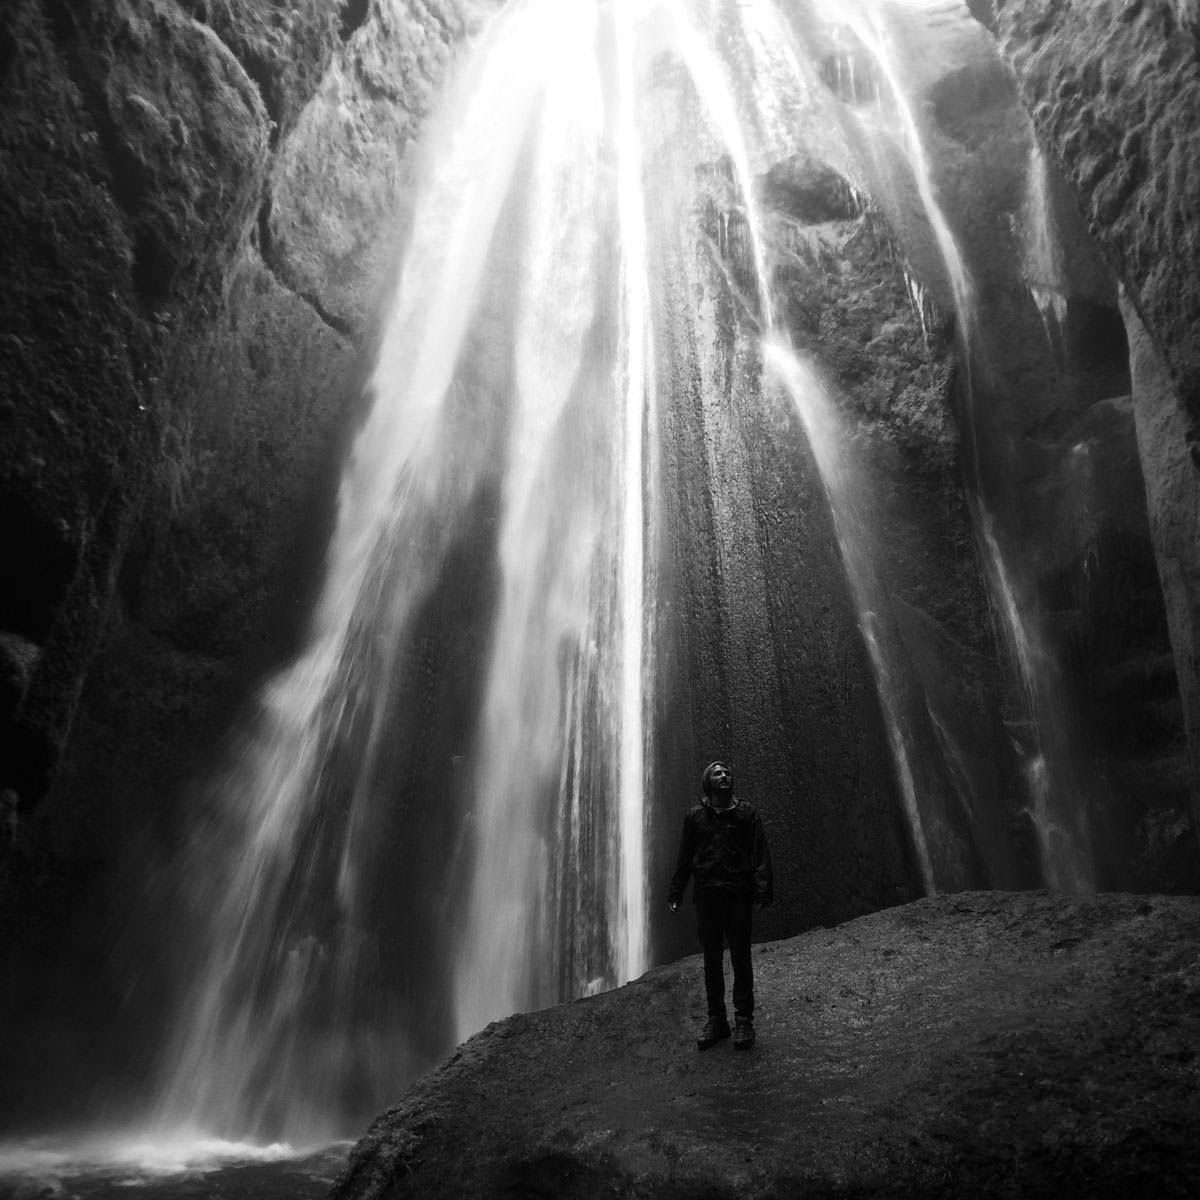
2. Use human subjects
Using human subjects in landscape photography is a great way to add foreground interest to your photos. But instead of the typical holiday photos with someone's face next to a landscape, I prefer taking photos of people who are admiring the landscape and not posing for the shot.

Including a solitary human figure in your landscape photos is a great way of adding an element of story to your photos, while at the same time providing the image with a sense of scale. This works particularly well when the person in your landscape photos is not posing for you.
3. Use sky in the composition
While the sky rarely stands out enough on warrant a photo on its own, having an interesting sky can make or break your landscape photos. In general, perfectly clear or uniformly overcast sky is boring, while partially cloudy sky can be used to greatly enhance your landscape photos.

Whenever there are interesting clouds in the sky, look for creative ways to incorporate them in the composition to add yet another layer of interest to your landscape photos.

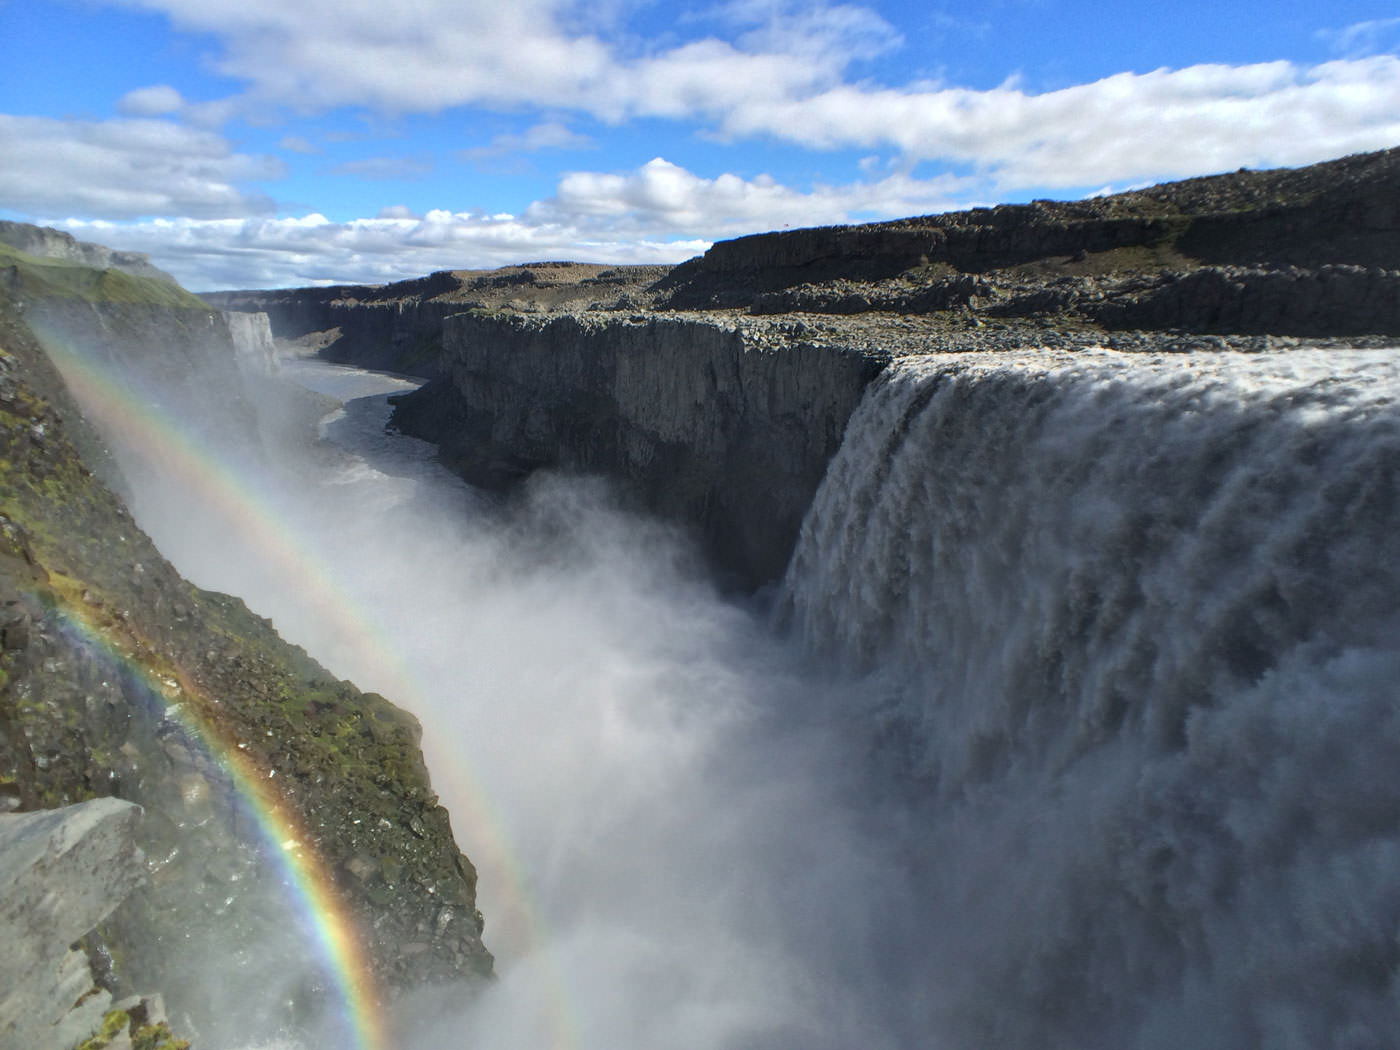
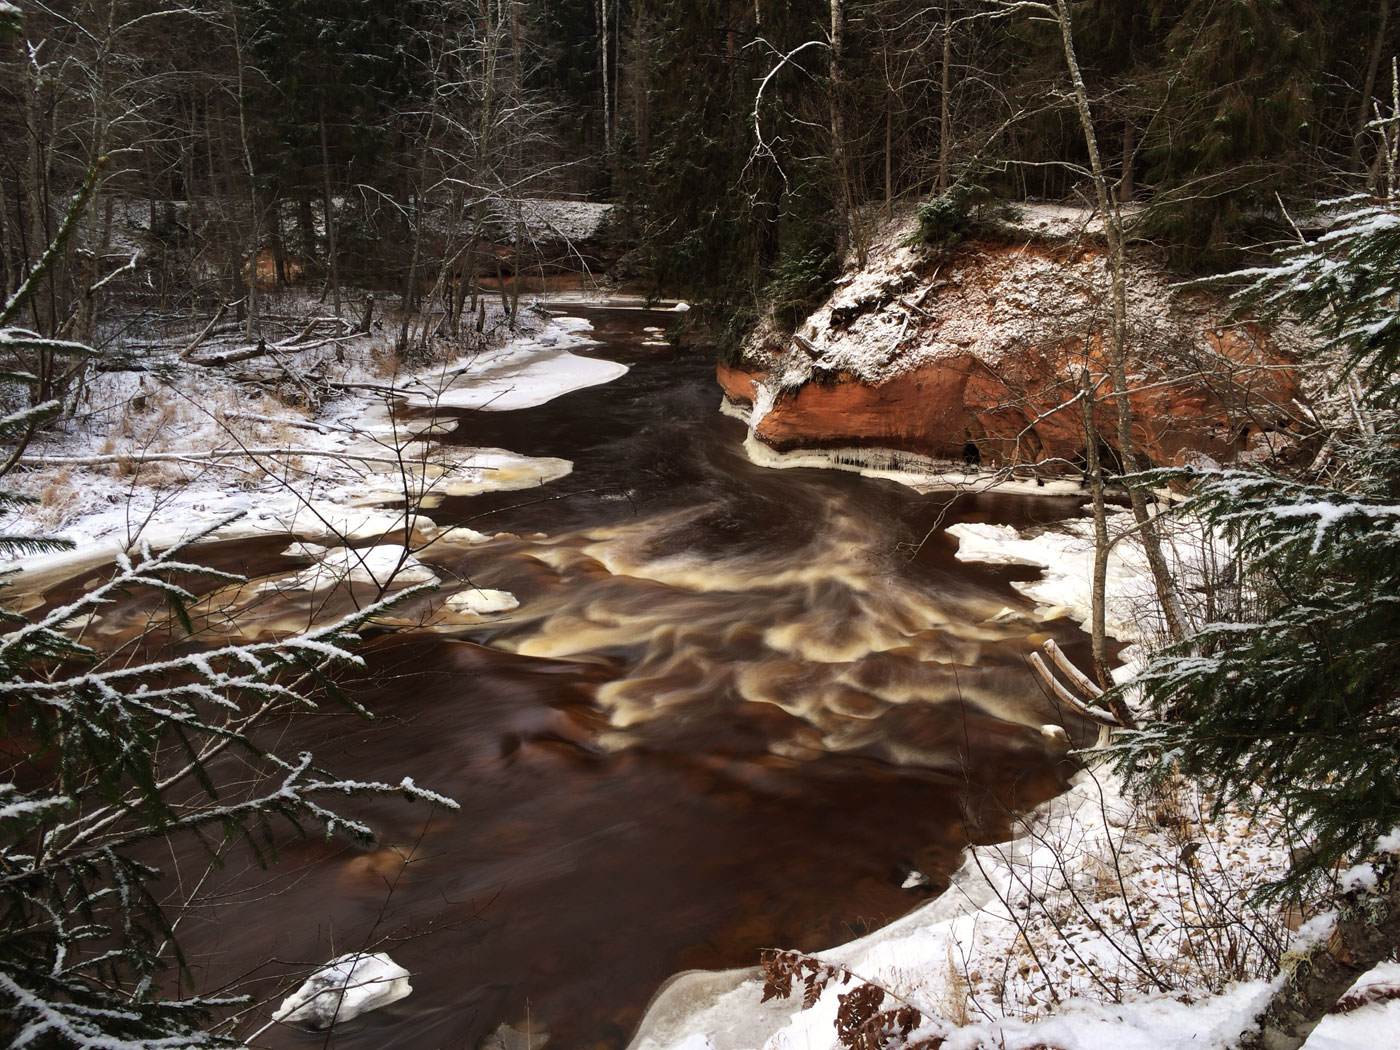
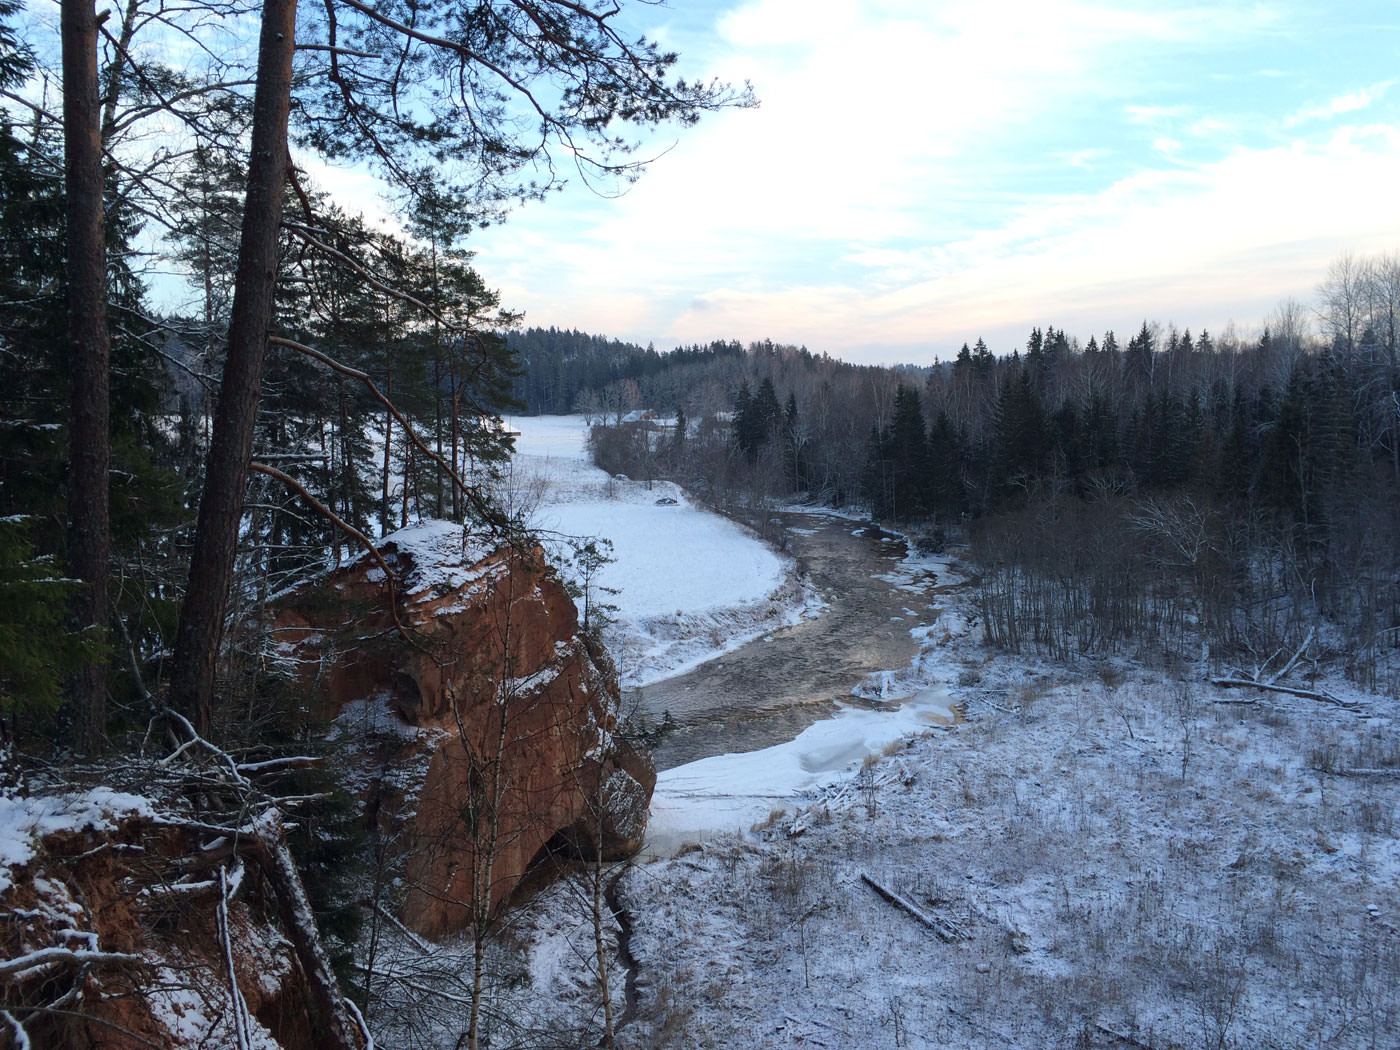
4. Pay attention to light conditions
Seasoned photographers know that photography is all about light, and even subtle changes in light conditions can make a huge difference in the resulting photo. This is especially true in landscape photography where small changes in light have a huge impact on your photos.
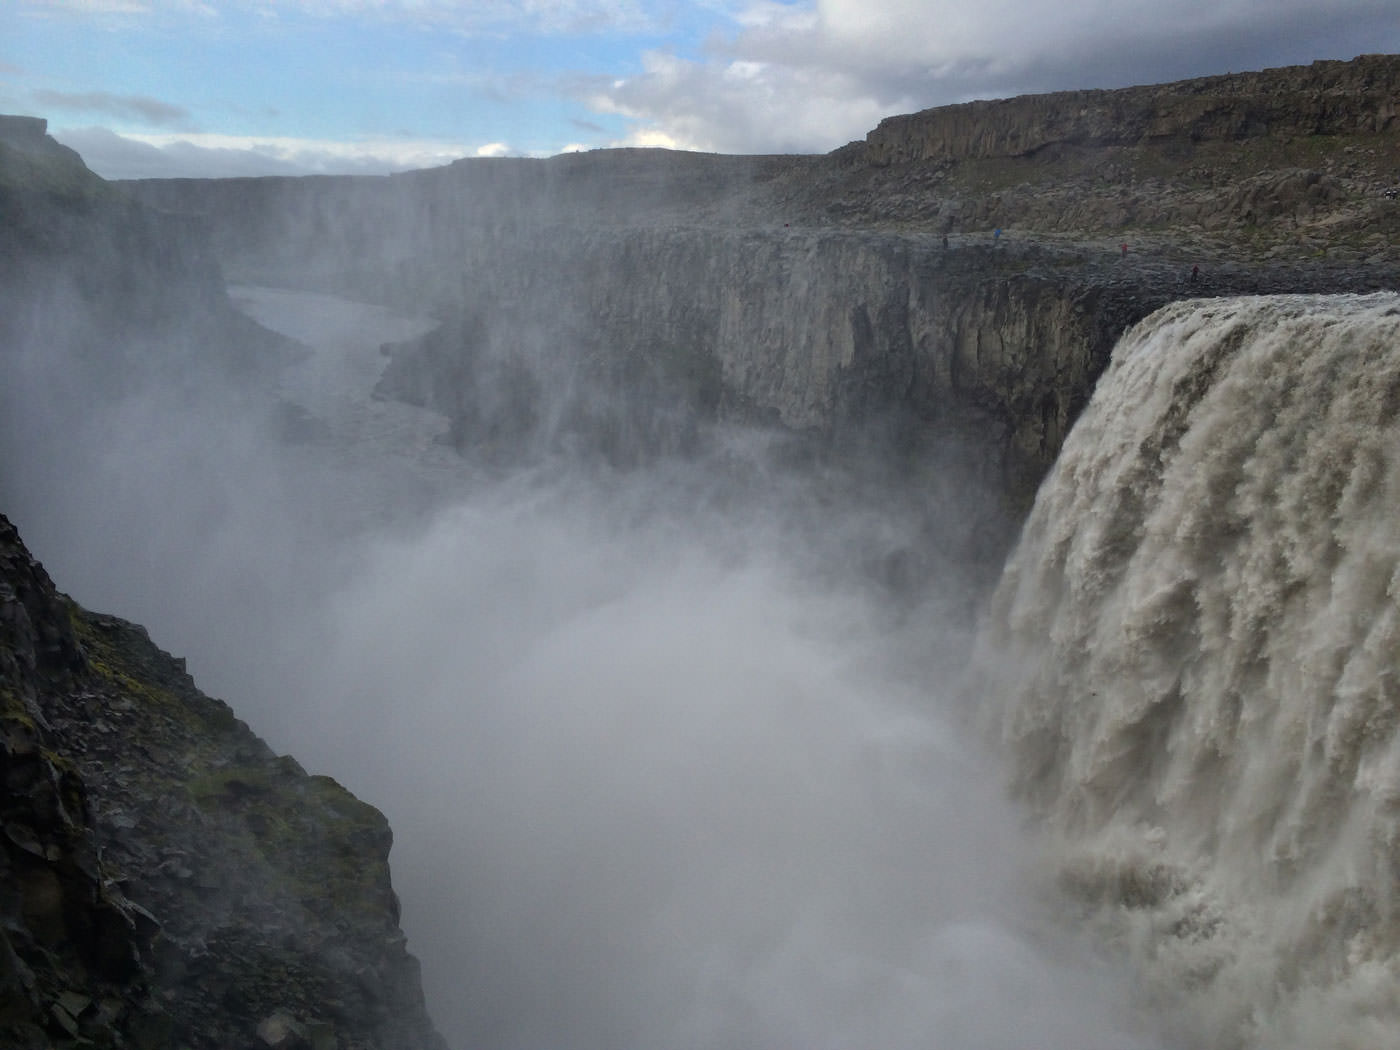
While this might not always be possible, you'll get the best results if you visit the same place in different light conditions, or even at different times of the year. These two photos show you just one example of the kind of difference light can make in your landscape photos!
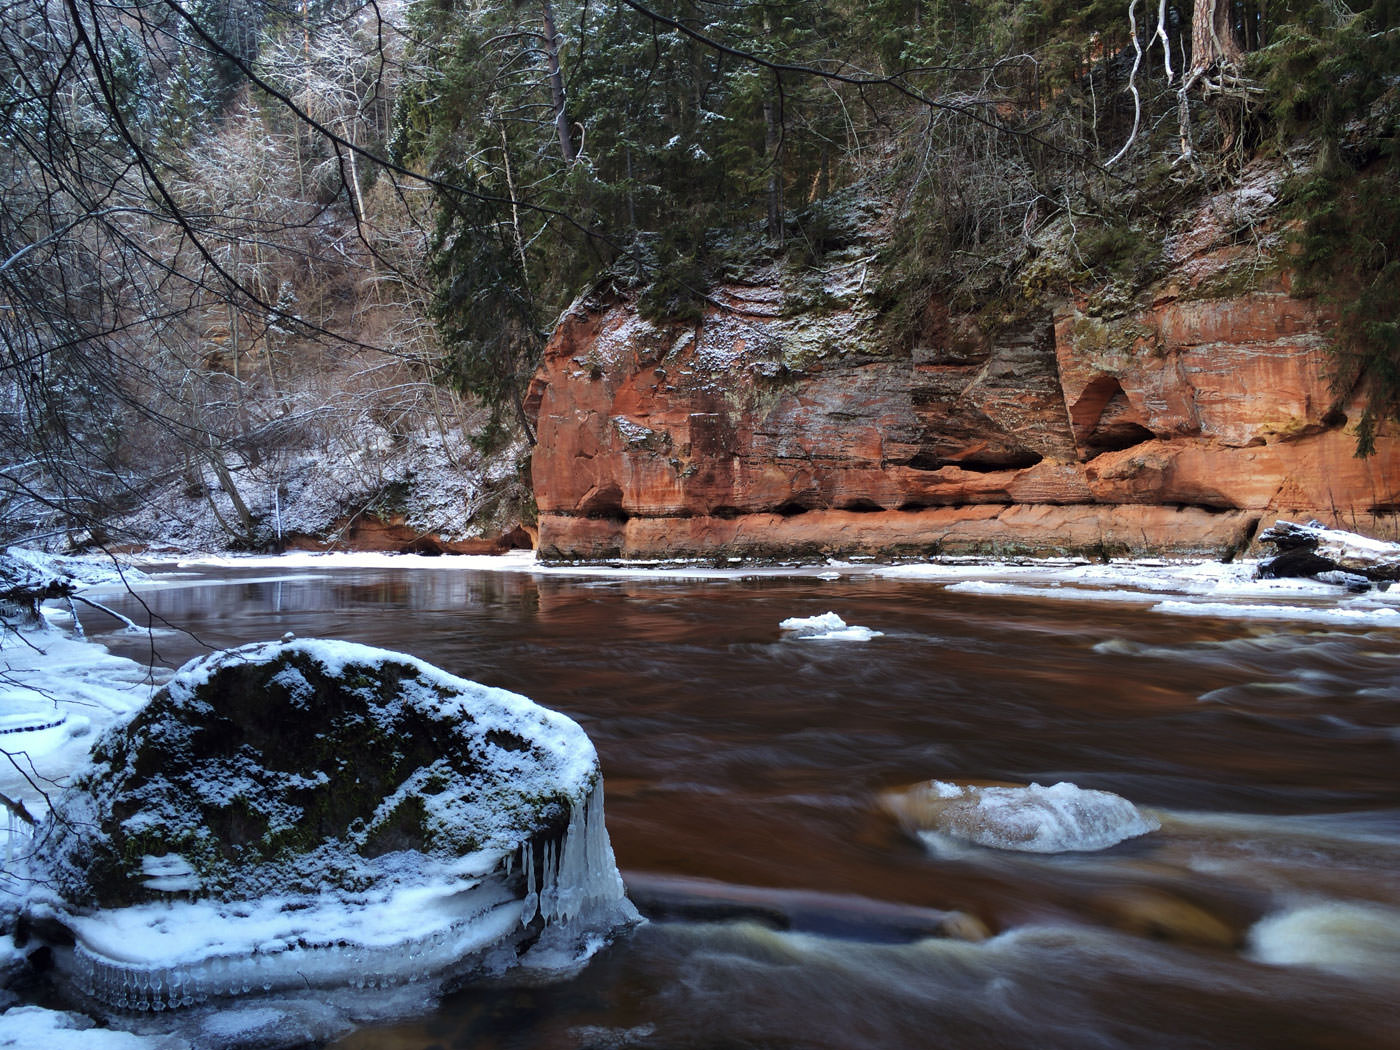
5. Follow the diagonal principle
The diagonal principle – which suggests that important subjects should be positioned diagonally from each other – is one of the most important composition guidelines. The diagonal principle works particularly well in landscape photos where composition can often be a challenge.
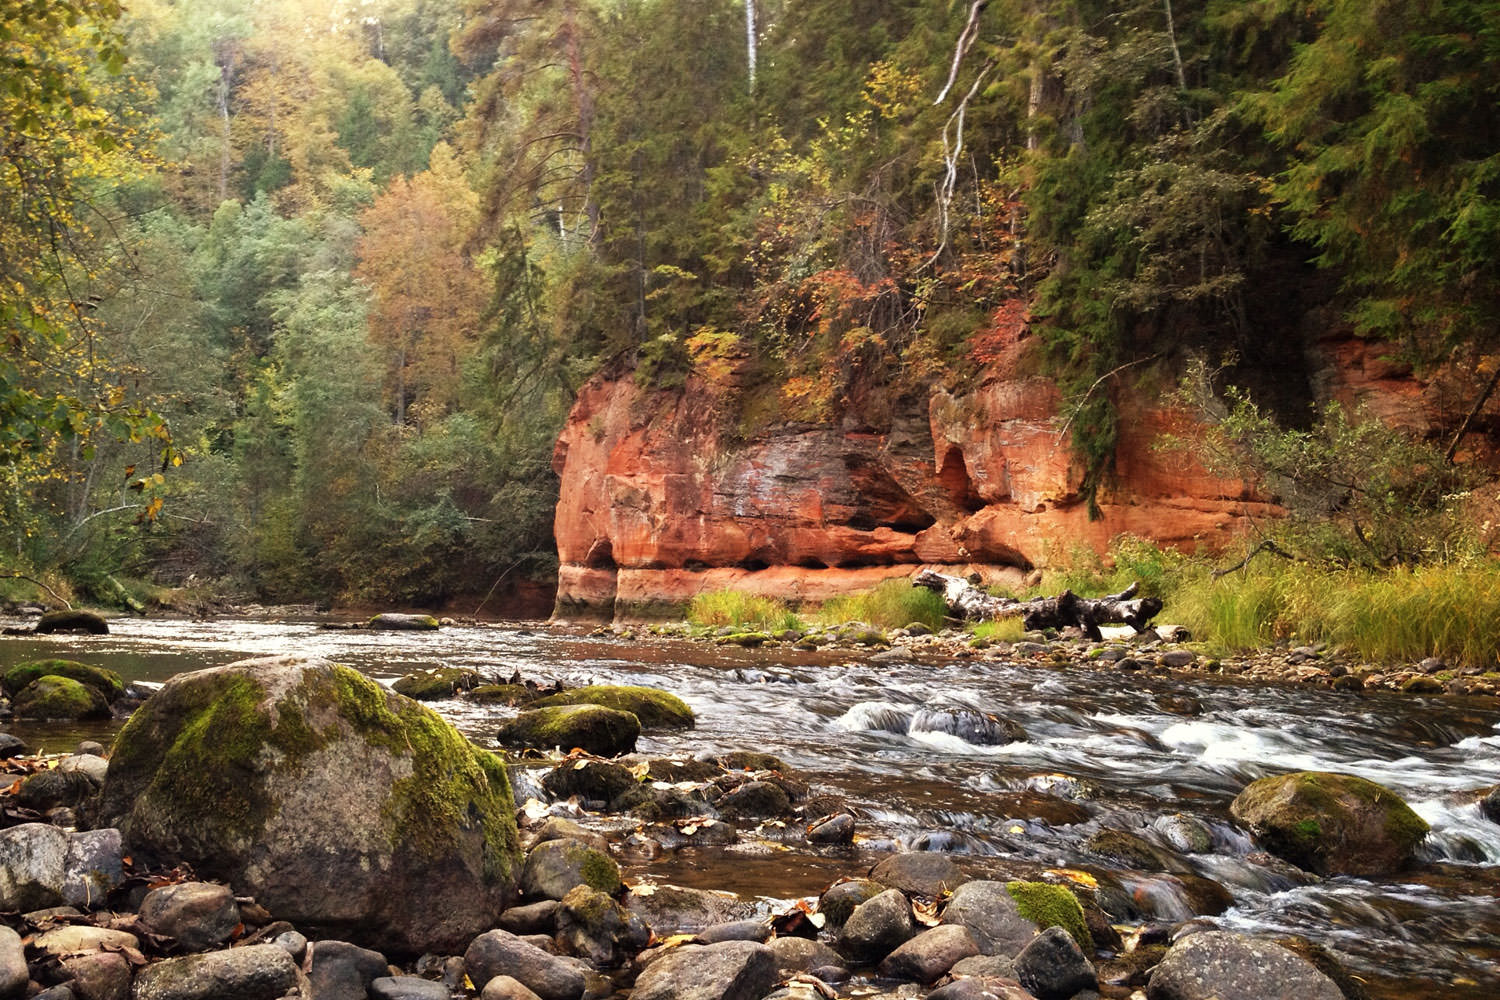
This photo has two important subjects (or focal points) – the smaller rock in the foreground and the large orange rock in the background. By positioning these diagonally from each other, the photo becomes balanced both horizontally and vertically, creating a harmonious composition.
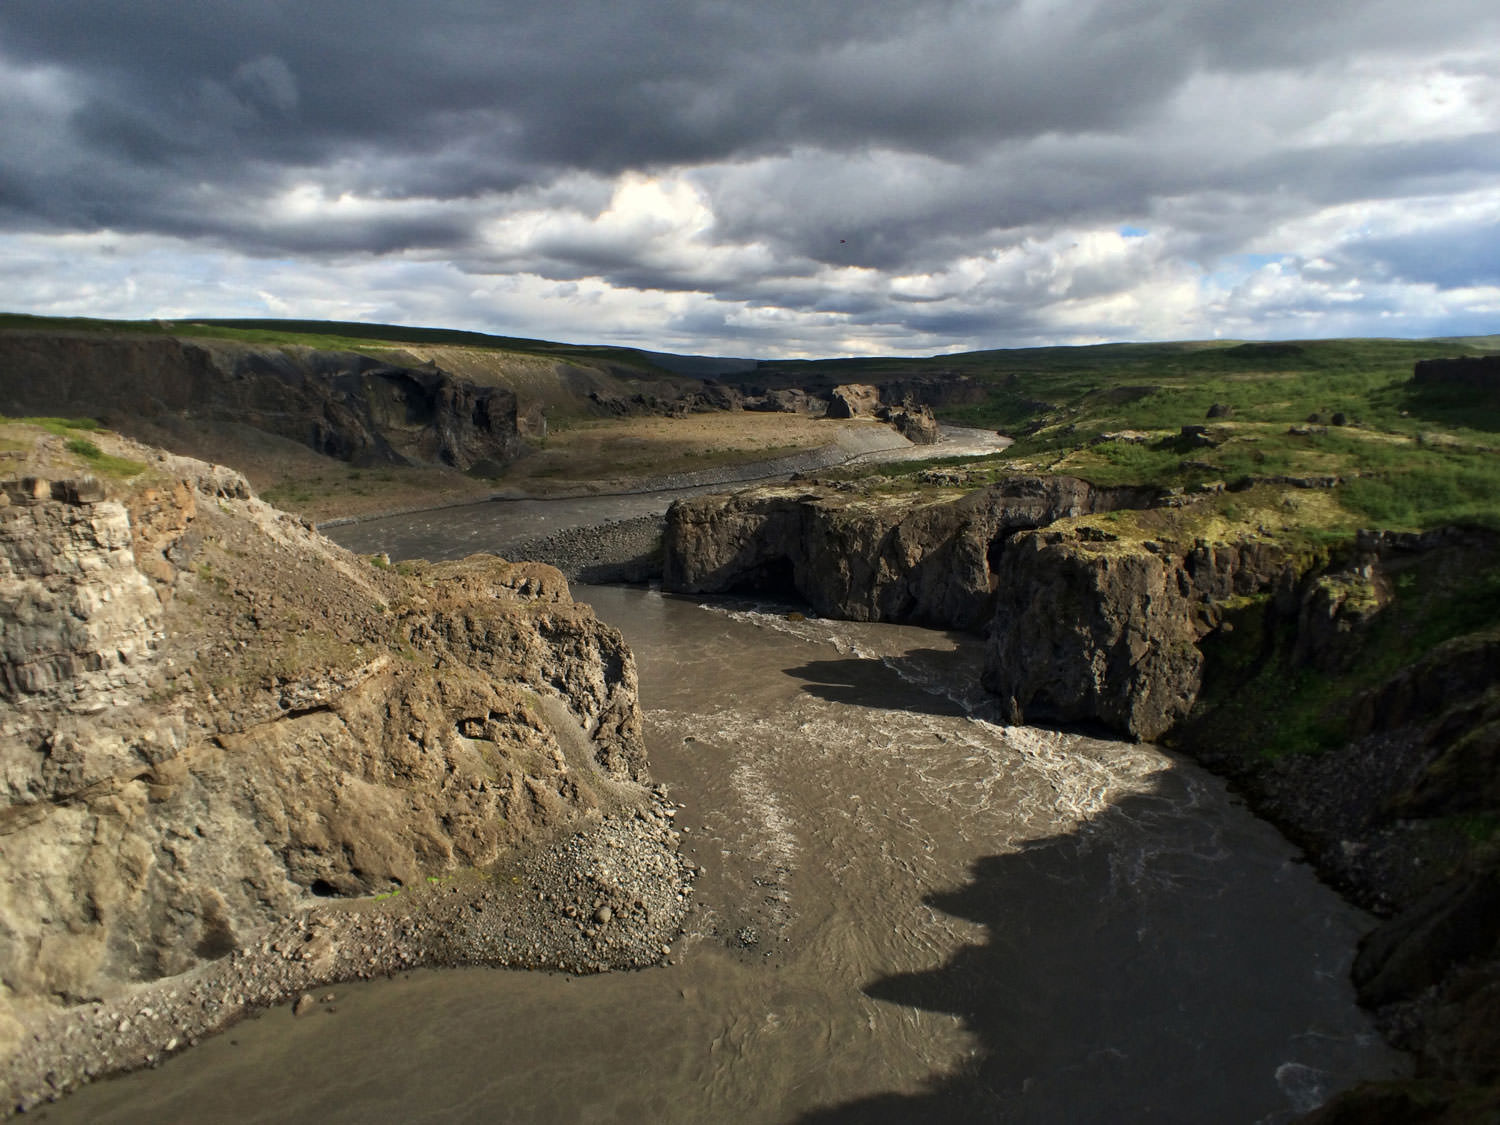
6. Include leading lines in your photos
There's nothing worse than a flat landscape photo. But if you can show depth in your landscape photos and make them feel immersive, they are going to have a much stronger impact on the viewer. And one of the best ways to make your photos immersive is using leading lines.

While any prominent lines in your photos can work as leading lines, some of the best leading lines in landscape photography are created by roads, paths and rivers. The best leading lines extend from foreground into the background, inviting the viewer to explore the landscape.
7. Use a wide angle iPhone lens
Several photos that you can can see on this page could only be taken because I was using a wide angle lens. While I generally advocate zooming with your feet, there are times when you simply can't get the entire landscape into the scene without using a wide angle lens.
In these situations it's extremely helpful to have a wide angle lens for your iPhone. Based on my experience I can recommend wide angle lenses from iPro and Moment. While there are cheaper alternatives available on the market, their optical quality is disappointing.
8. Take sharper photos using a tripod
One of the advantages of landscape photography is that you have a lot of time to prepare the perfect photo, which makes it possible for you to use a tripod. A tripod will not only help you take sharper photos, but it will also force you to think about framing your photos more carefully.
While any tripod will work with your iPhone, for landscape photography I recommend getting a serious DSLR tripod that can support your iPhone on wet rocks and other slippery surfaces. You will also need a tripod mount such as Glif to attach your iPhone to the tripod.
9. Take HDR photos
Getting a well balanced exposure can be a challenge in landscape photography, especially if the sky is also included in your photos. Without HDR, you will either get dark foreground or the sky will be overexposed, resulting in loss of detail in clouds as seen in the example below.
The best solution to this problem is HDR photography, which automatically combines different exposures of the same photo into one better-exposed image as seen below (both unedited).

You can take simple HDR photos using the native Camera app, but you can get a more powerful HDR effect using VividHDR app, which is now available directly inside ProCamera 8.
10. Always keep practicing
These tips and techniques provide a great starting point for iPhone landscape photography. But if you really want to achieve extraordinary results, you'll have to put in some work and apply these techniques until you find your own once-in-a-lifetime photo opportunities.

You might not get extraordinary results the next time you're taking photos with your iPhone, but if you're persistent and if you keep practicing, your iPhone photos will definitely improve!
How To Take Landscape Photos With Iphone
Source: https://www.procamera-app.com/en/blog/10-tips-for-taking-stunning-landscape-photos-with-your-iphone/
Posted by: campbellyeard1966.blogspot.com
0 Response to "How To Take Landscape Photos With Iphone"
Post a Comment